如何安装并使用 anaconda、jupyterlab、node.JS 和 xpython 进行调试?以下是详细的步骤指南。
基本流程
- 安装 Anaconda
- 安装 JupyterLab
- 安装 Node.js
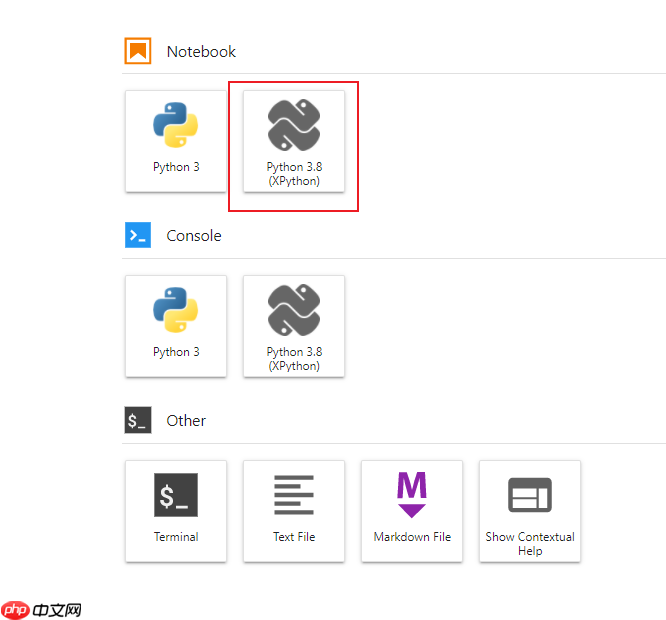
- 安装 Xpython
- 建立 JupyterLab 工程
- 搜索并安装插件
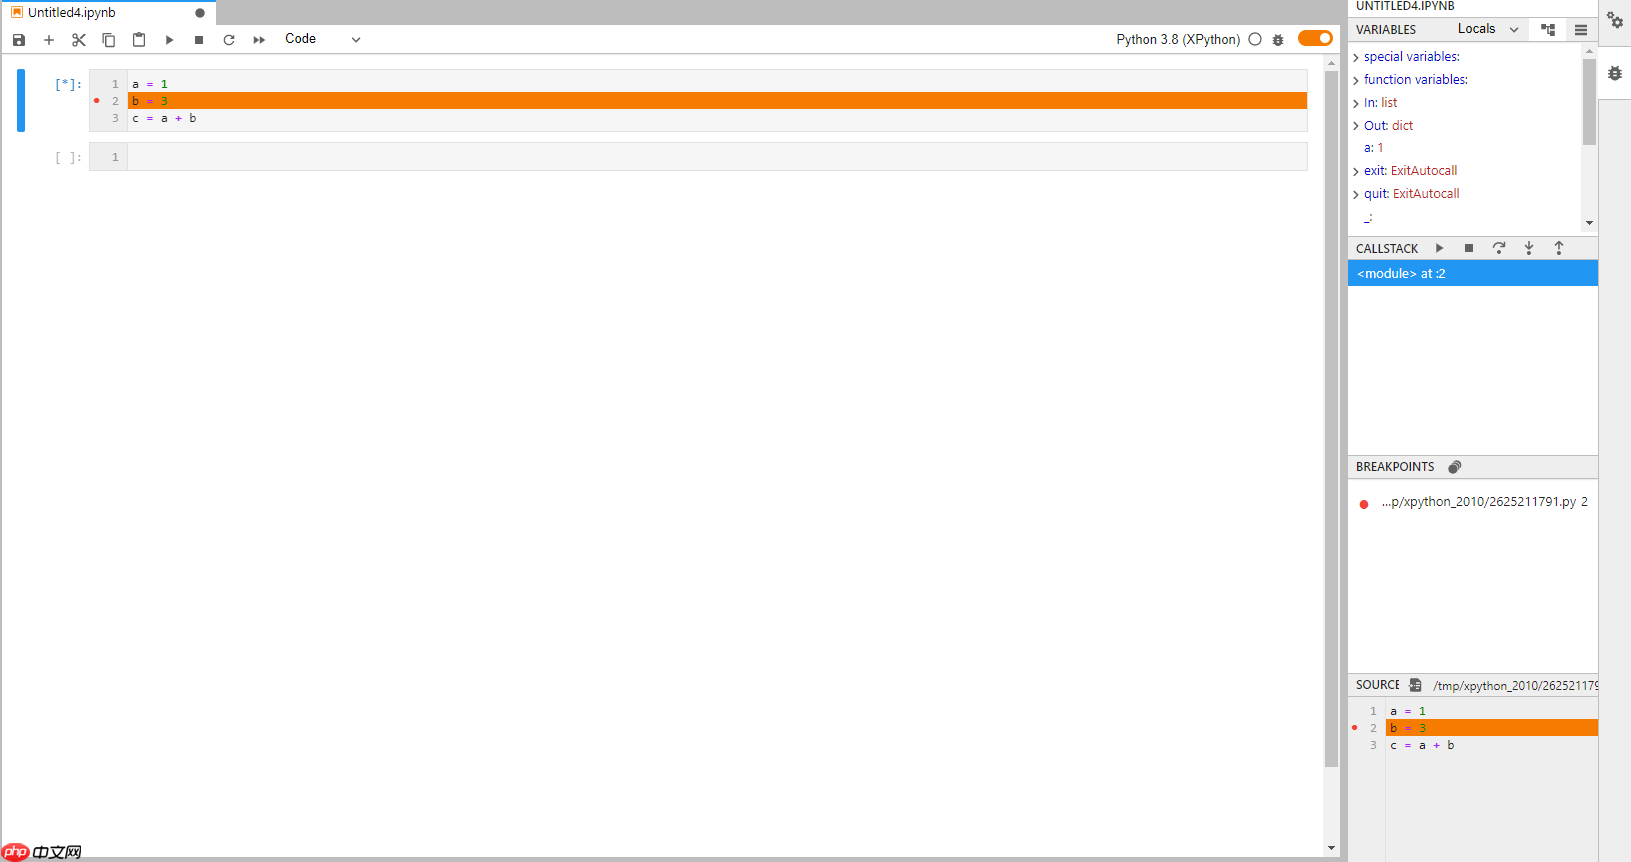
- 使用插件进行调试
具体步骤
安装 Anaconda
- 下载地址:https://www.php.cn/link/6005fb5ae0d58f2b5c9dd63b6089b92b
- 下载安装包并安装,需要配置环境变量。
安装 JupyterLab
使用以下命令安装 JupyterLab:
pip install jupyterlab
安装 Node.js
在安装某些 JupyterLab 扩展时,需要 Node.js。安装步骤如下:
- 下载地址:https://www.php.cn/link/8c8ee26d59b77a94dc6747a41e7c3af0
- windows:下载 Windows Installer (.msi) 并直接安装。
- linux:下载 Linux Binaries (x64) 并执行以下命令:
wget https://nodejs.org/dist/v14.17.3/node-v14.17.3-linux-x64.tar.xz // 下载 tar xf node-v14.17.3-linux-x64.tar.xz // 解压
- 配置环境变量:
export PATH=$PATH:/path_to/node-v14.17.3-linux-x64/bin
- 测试安装:
# node -v v14.17.3
安装 XPython
使用以下命令安装 XPython:
pip install xeus-python
安装完成后,您可以使用 XPython。

建立 JupyterLab 工程
使用以下命令启动 JupyterLab:
jupyter lab --allow-root --no-browser --ip 0.0.0.0 --port 8080 --notebook-dir /workspace/nfs
如果需要映射端口,可以参考从服务器映射 Jupyter 到本机的应用。
搜索并安装插件
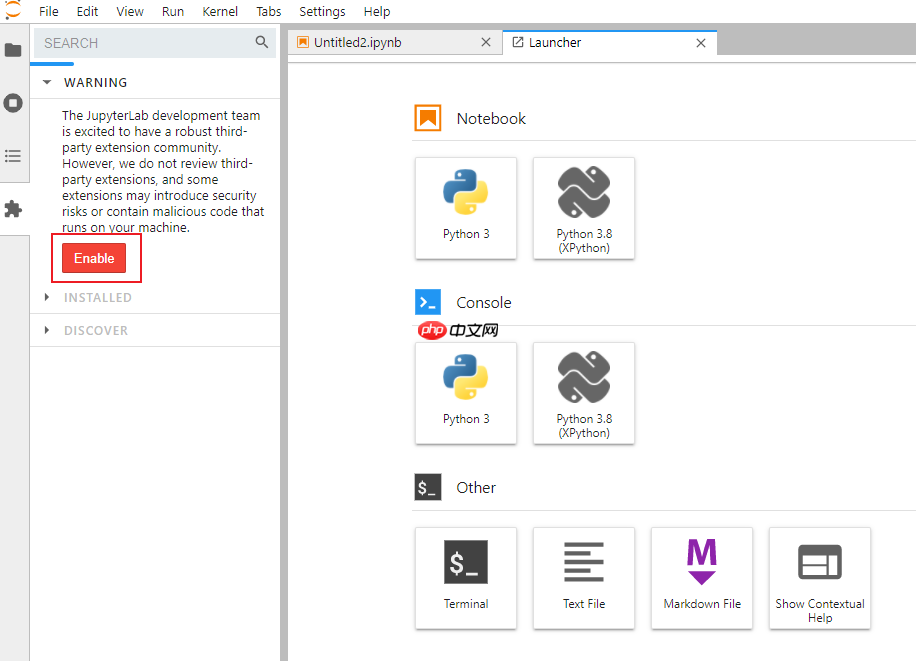
进入 JupyterLab,启用警告中的内容即可使用扩展。

您可以通过以下方式搜索并安装插件:
- 在 JupyterLab 中搜索并点击 install。
- 或者执行以下命令:
jupyter labextension install @jupyterlab/debugger
使用插件进行调试
建立 XPython 工程后,设置断点并调试程序。

参考资料
通过以上步骤,您可以顺利安装并配置 Anaconda、JupyterLab、Node.js 和 XPython,并使用插件进行调试。
© 版权声明
文章版权归作者所有,未经允许请勿转载。
THE END


